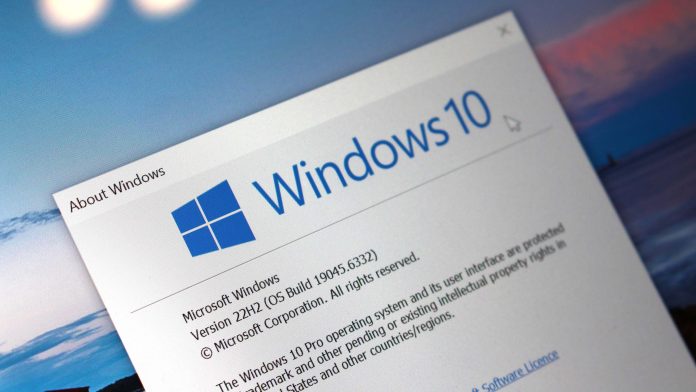
The life of Windows 10 is expected to end on October 14, 2025, after ten long years, and this means that Microsoft will stop providing maintenance and security updates, as well as technical support.
This “end of life” milestone doesn’t mean your computer will suddenly stop working. However, it does mean that staying on Windows 10 will (eventually) leave your device vulnerable to security threats and software and hardware compatibility issues. If you want to continue using your computer in a secure manner, you’ll need to take action now, whether that means enrolling in the Extended Security Updates (ESU) program, upgrading supported hardware to Windows 11, or finding alternative paths for unsupported devices.
In this how-to guide, I’ll outline three methods for continuing to use the same hardware with Windows 10 or Windows 11.
Warning: If you pick the option to upgrade a computer with supported or unsupported hardware, before proceeding with the instructions, it’s critical to create a full backup of your computer in case something goes wrong, and you have to roll back to the previous version.
1. Enroll PC in the Extended Security Updates program
The easiest way to continue using the same computer is to enroll it in the ESU program, which will extend support until October 13, 2026.
Microsoft offers three options for joining the program:
- Free – You can enroll for free if you’re backing up files to OneDrive, regardless of whether you have a Microsoft 365 subscription.
- Microsoft Rewards – You can also redeem 1,000 points if you’re enrolled in the rewards program.
- Paid – Alternatively, you can pay $30 to access the program.
Regardless of the option you choose, you can enroll up to 10 devices tied to the same Microsoft account. Also, since the enrollment information is tracked in your account, you must be signed in with your Microsoft account.
Also, you have to make sure that your computer is running Windows 11 version 22H2 with the latest updates installed from the “Windows Update” settings.
To sign up your Windows 10 PC in the Extended Security Updates (ESU) program, use these steps:
- Open Settings.
- Click on Update & Security.
- Click on Windows Update.
- Click the “Check for updates” button to ensure the device has the latest updates, and the enrollment option becomes available.
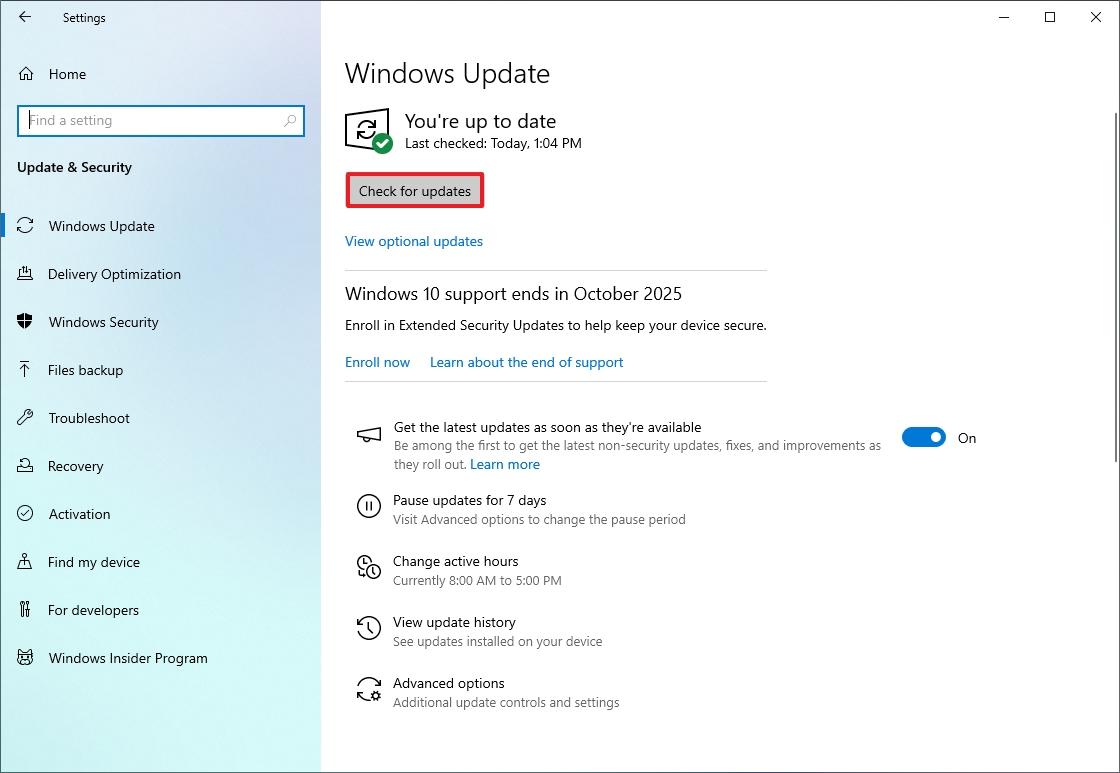
- Click the Enroll now option under the end of support notification.
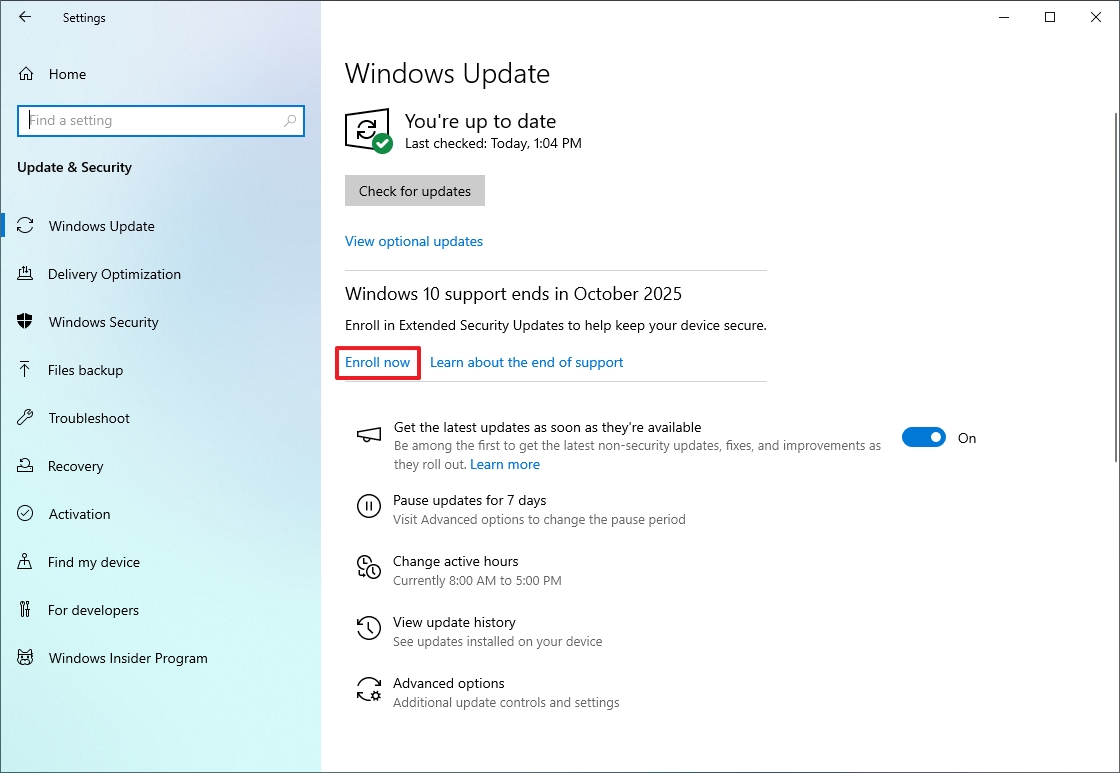
- Click the Next button.
- Select the option to enroll your device, including “Back up your PC settings,” “Redeem Microsoft Rewards points,” or “One time purchase.”
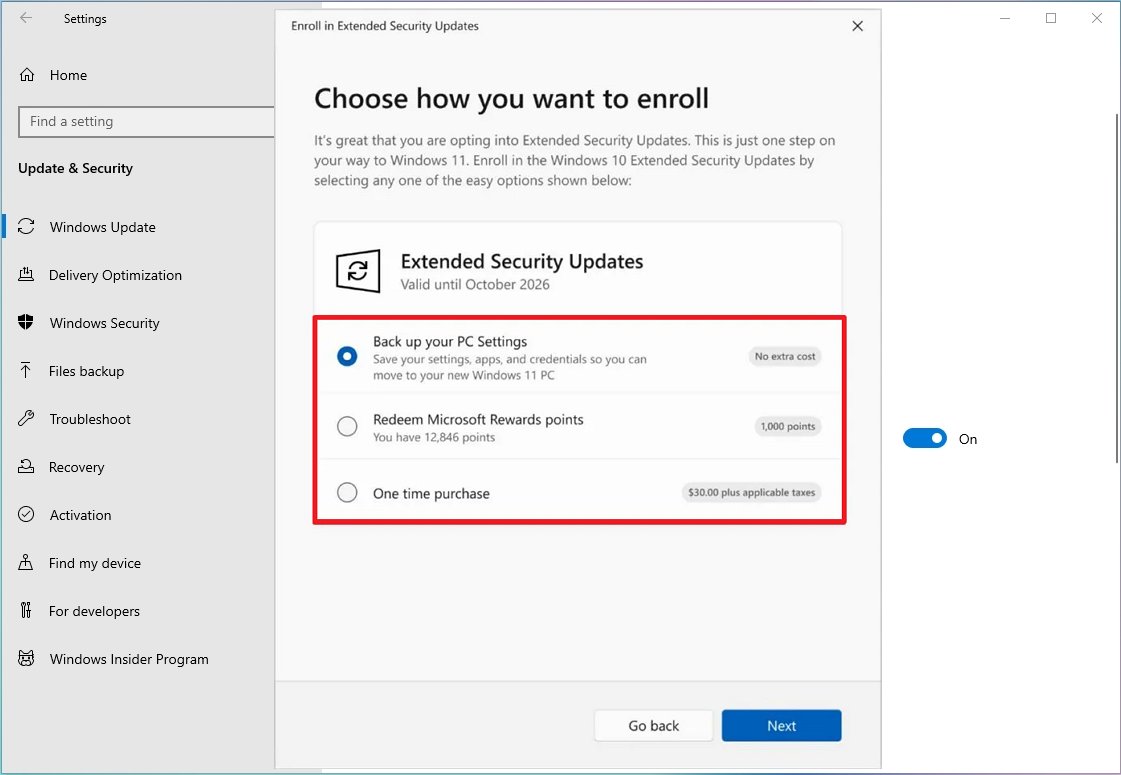
- Quick note: If the system detects that you’re already backing up files to the cloud, you’ll see the “Enroll” option immediately. If you’re adding a second device, you’ll see the “Add device” option instead.
- Click the Next button.
- Continue with the on-screen directions.
- Click the Done button.
- Check for the “Your PC is enrolled to get Extended Security Updates” message in the Windows Update settings to confirm the enrollment.
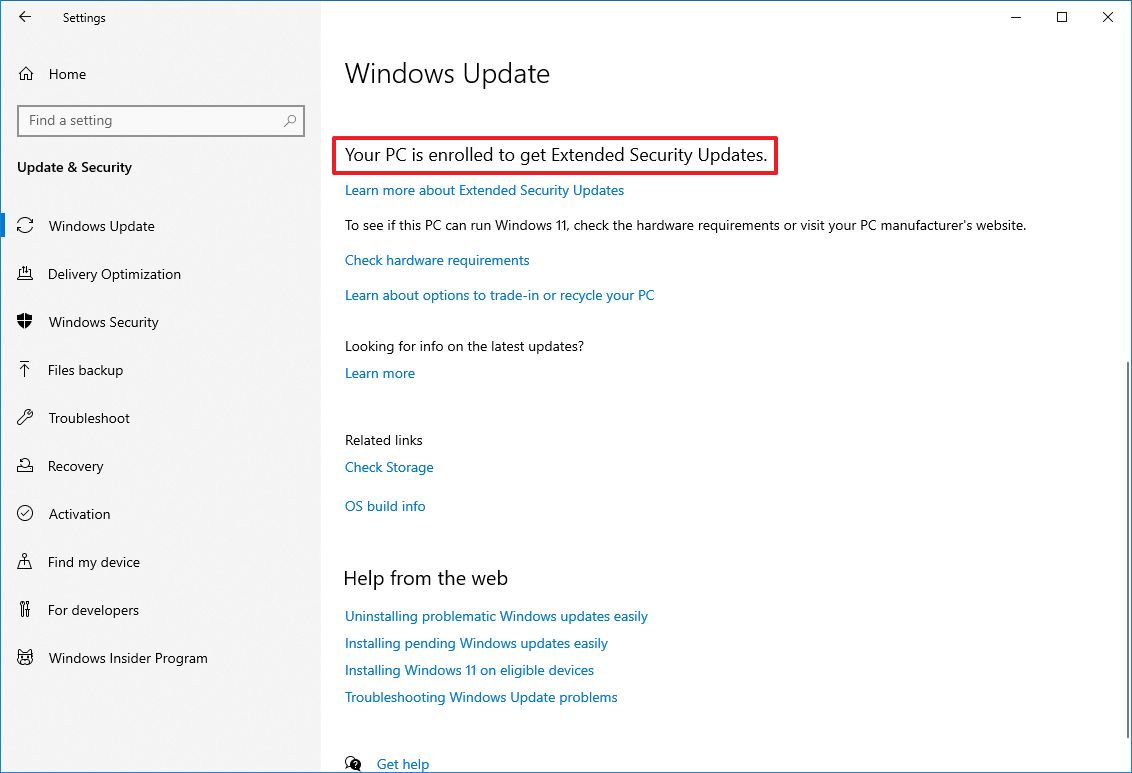
Once you complete the steps, critical and security updates (only) will continue to be available on your Windows 10 computer until October 2026.
The program doesn’t offer updates to improve the system or add new features, nor does it include Microsoft technical support.
2. Upgrade a supported PC to Windows 11
The recommended method to keep using the same computer is to upgrade from Windows 10 to Windows 11 through the “Windows Update” settings.
You perform the in-place upgrade before or after the support of the operating system ends on October 14, 2025.
The option to perform an in-place upgrade will depend on your hardware configuration. For example, in addition to processor, memory, and storage specifications, the computer must be using the Unified Extensible Firmware Interface (UEFI) with the Trusted Platform Module (TPM) enabled.
Secure Boot is highly recommended, but it’s not a requirement for the installation of the operating system.
On computers that still use the legacy Basic Input/Output System (BIOS), it’s necessary to convert from the Master Boot Record (MBR) partition style to the GUID Partition Table (GPT) before switching to the UEFI mode. This conversion can be accomplished using the MBR2GPT command-line tool, which enables a seamless transition without data loss. If you don’t complete the conversion before enabling UEFI mode, the computer will fail to boot.
Upgrade PC with required components already enabled
To upgrade Windows 10 to 11 through Windows Update on a device using UEFI with TPM 2.0 already enabled, use these steps:
- Open Settings.
- Click on Update & Security.
- Click on Windows Update.
- Click the Check for updates button.
- Click the “Download and install” button.
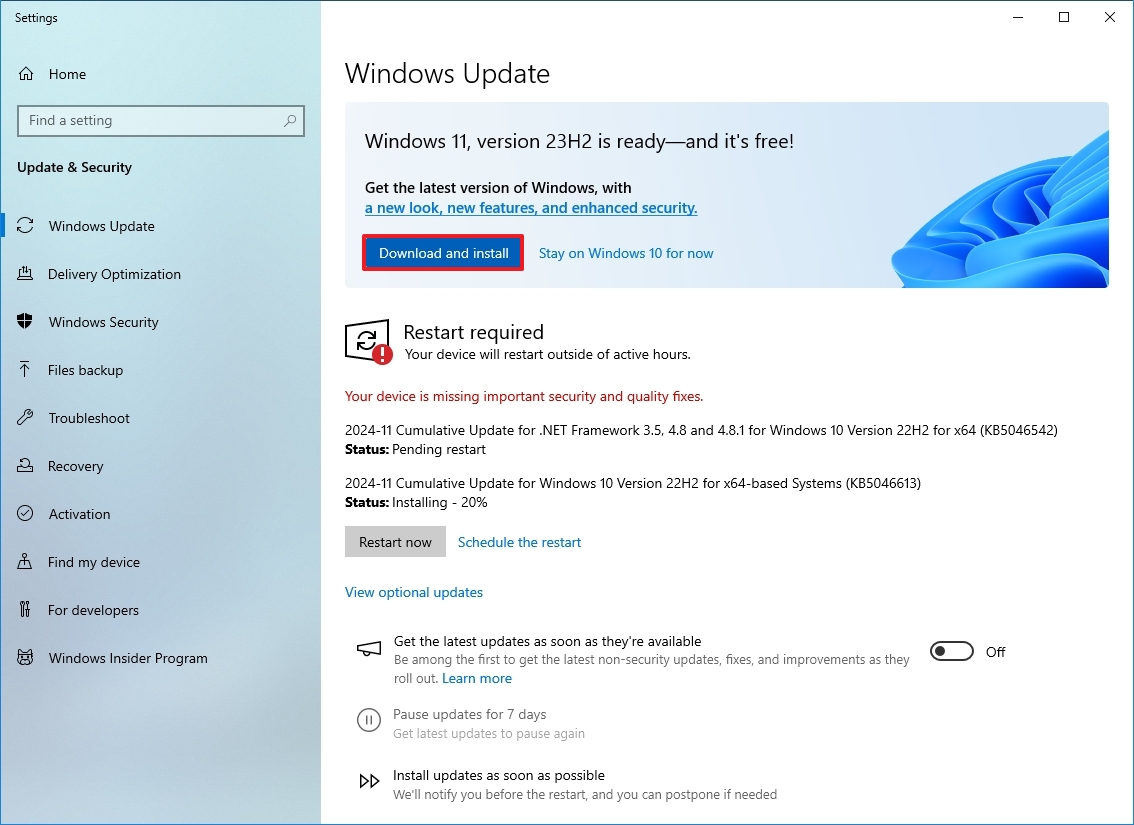
- Click the Restart now button.
After you complete the steps, the computer will restart, and the upgrade to the newer version of the operating system will begin.
If you want to use the Installation Assistant or ISO file to upgrade to Windows 11, follow these instructions. Alternatively, you can always upgrade using a clean installation with these instructions.
Upgrade PC with required components disabled
If you have a computer with compatible hardware but is still using the legacy BIOS with the MBR-style partition, you must first convert the partition to the GPT style and then switch to UEFI and enable TPM 2.0.
Convert MBR to GPT partition style
To convert a drive using MBR to GPT on Windows 10, use these steps:
- Open Settings.
- Click on Update & Security.
- Click on Recovery.
- Click the Restart now button under the “Advanced startup” section.
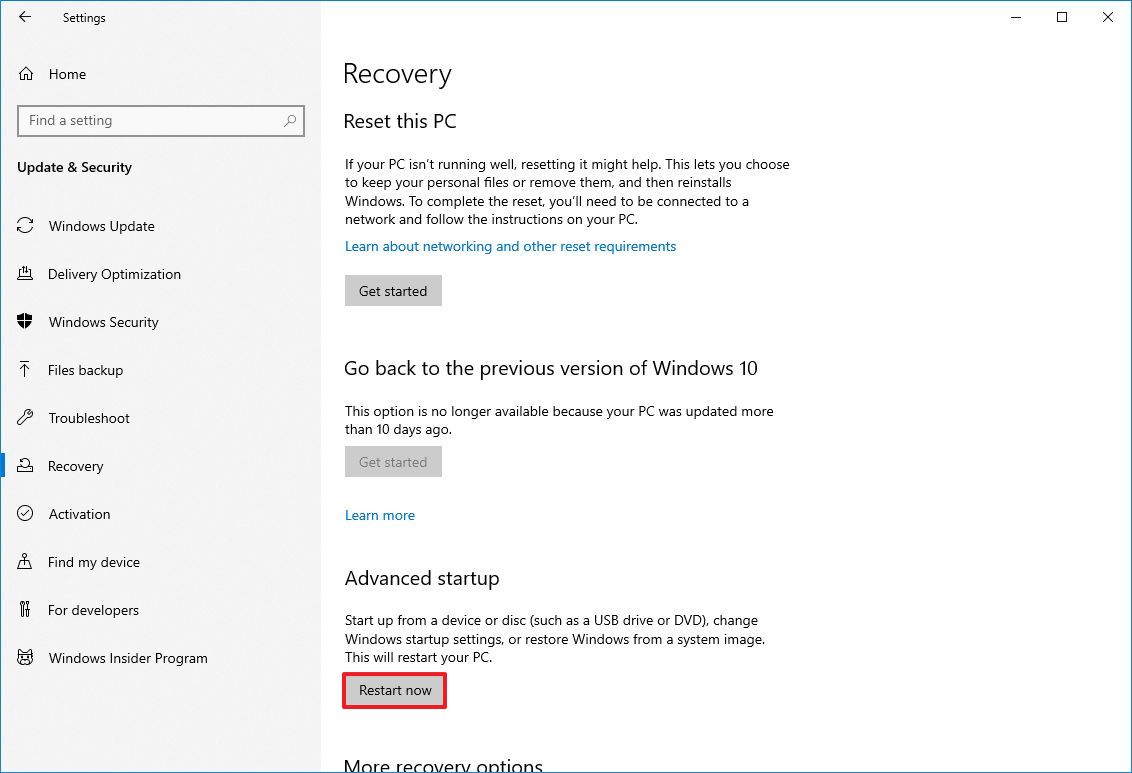
- Click the Troubleshoot option.
- Click on Advanced options.
- Click the Command Prompt option.
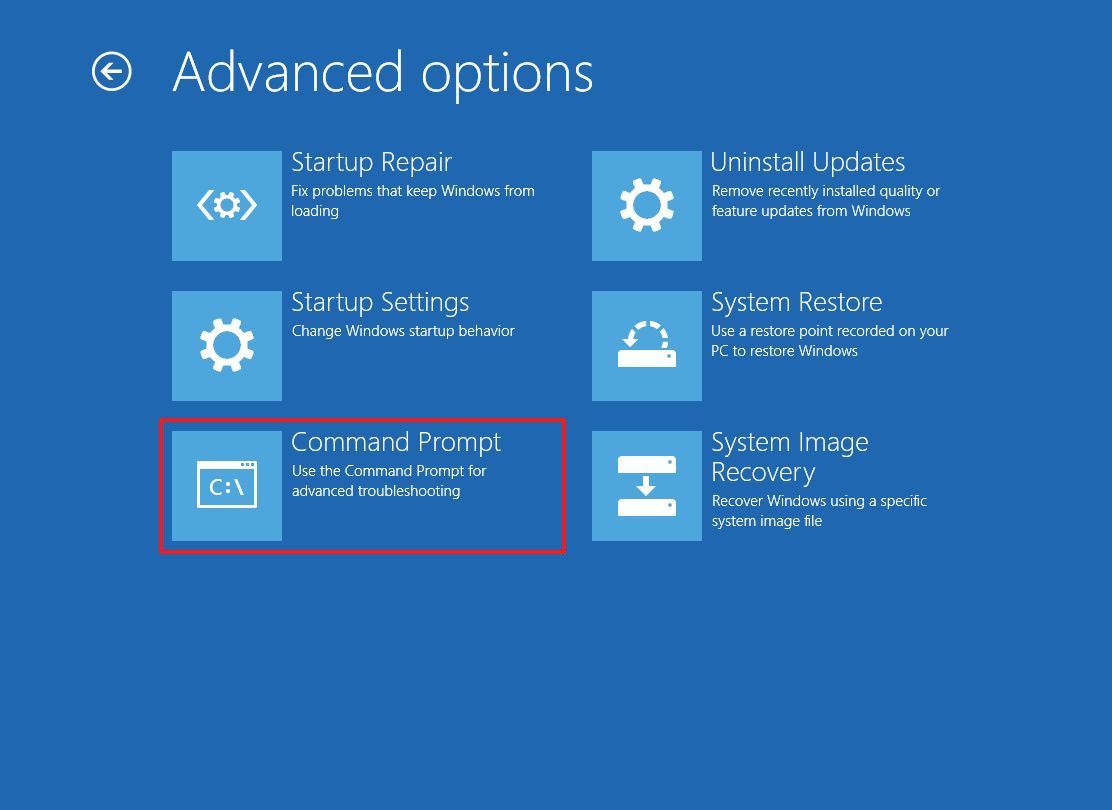
- Select your administrator account and sign in (if applicable).
- Type the following command to validate the drive’s requirements and press Enter: mbr2gpt /validate
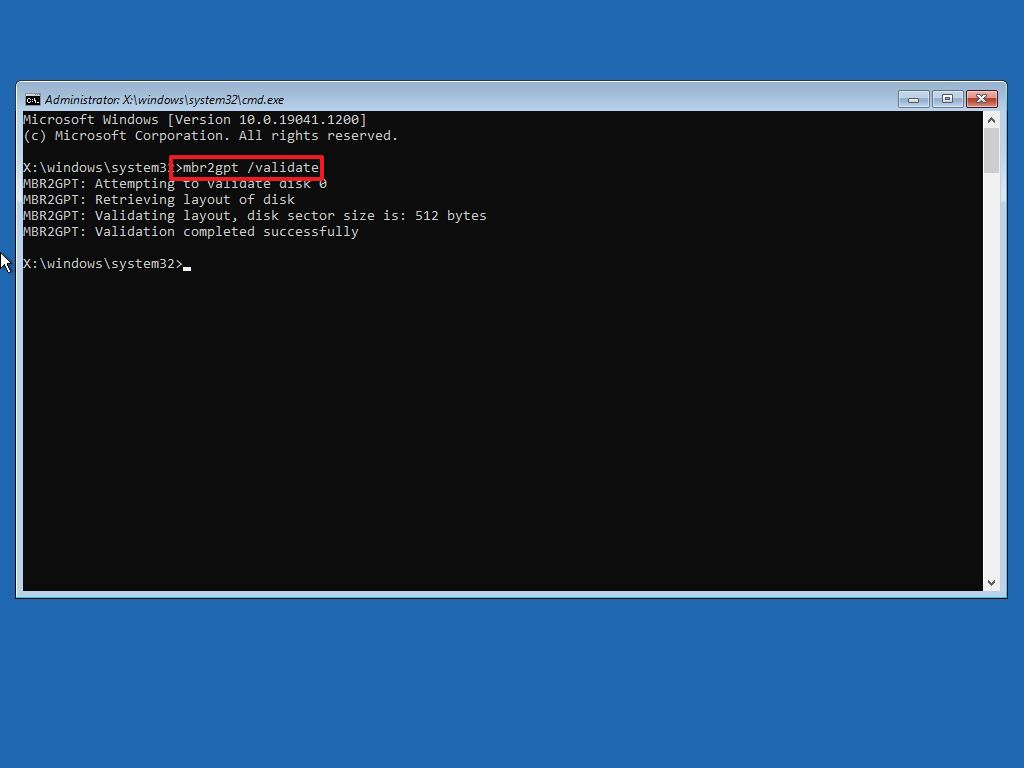
- Type the following command to convert the drive from MBR to GPT and press Enter: mbr2gpt /convert
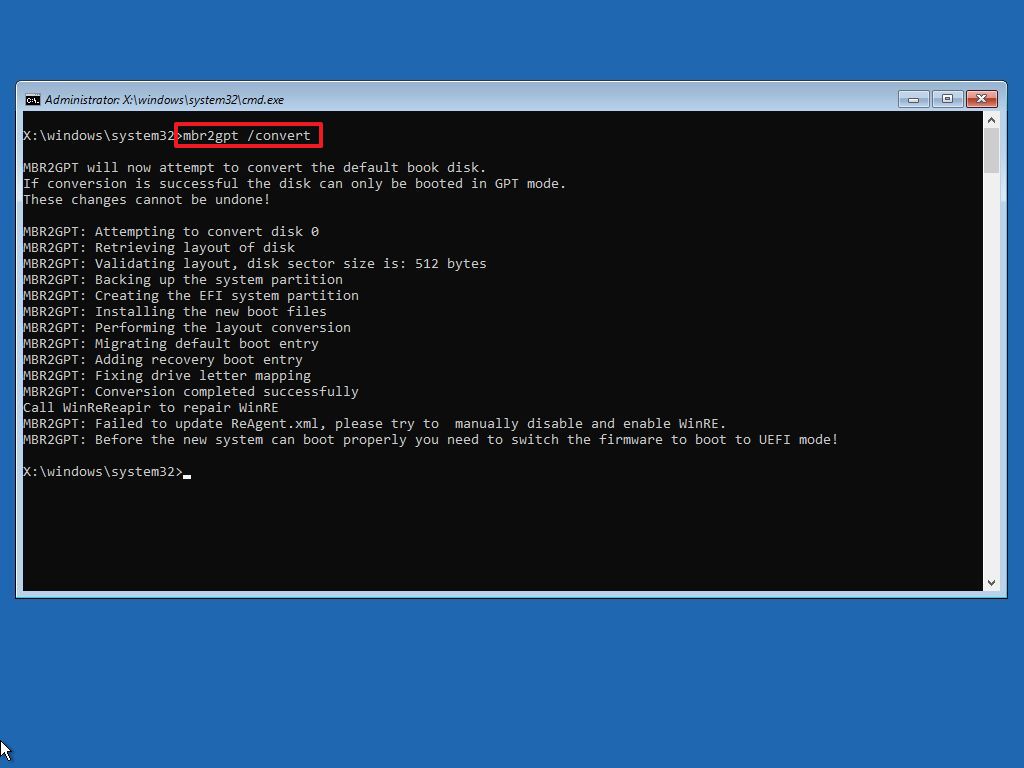
- Quick note: The command output in this image indicates that the conversion has completed successfully, but there was an issue with the Windows Recovery Environment. If this happens, once you’re in the desktop, run then the reagentc /disable and reagentc /enable commands from Command Prompt (admin).
- Click the Close button.
- Click the “Turn off your PC” option.
Once you complete the steps, the partition will be converted to GPT, and the computer will stop booting correctly because you will need to switch the firmware type to UEFI.
Switch from BIOS to UEFI
To change the firmware type on your computer, use these steps:
- Press the power button to start the computer.
- Press the key as indicated on the screen to access the firmware.
- Quick note: These steps are different depending on the computer model and manufacturer, but usually you have to press the Delete, Esc, or one of the Function keys to access the firmware.
- Open the boot menu (depending on your motherboard).
- Select the option to switch from BIOS to UEFI.
- Save the changes.
After completing the steps, the computer should start normally.
Enable TPM 2.0 inside UEFI
To enable TPM 2.0 on your computer, use these steps:
- Open Settings.
- Click on Update & Security.
- Click on Recovery.
- Click the Restart now button under the “Advanced Startup” section.
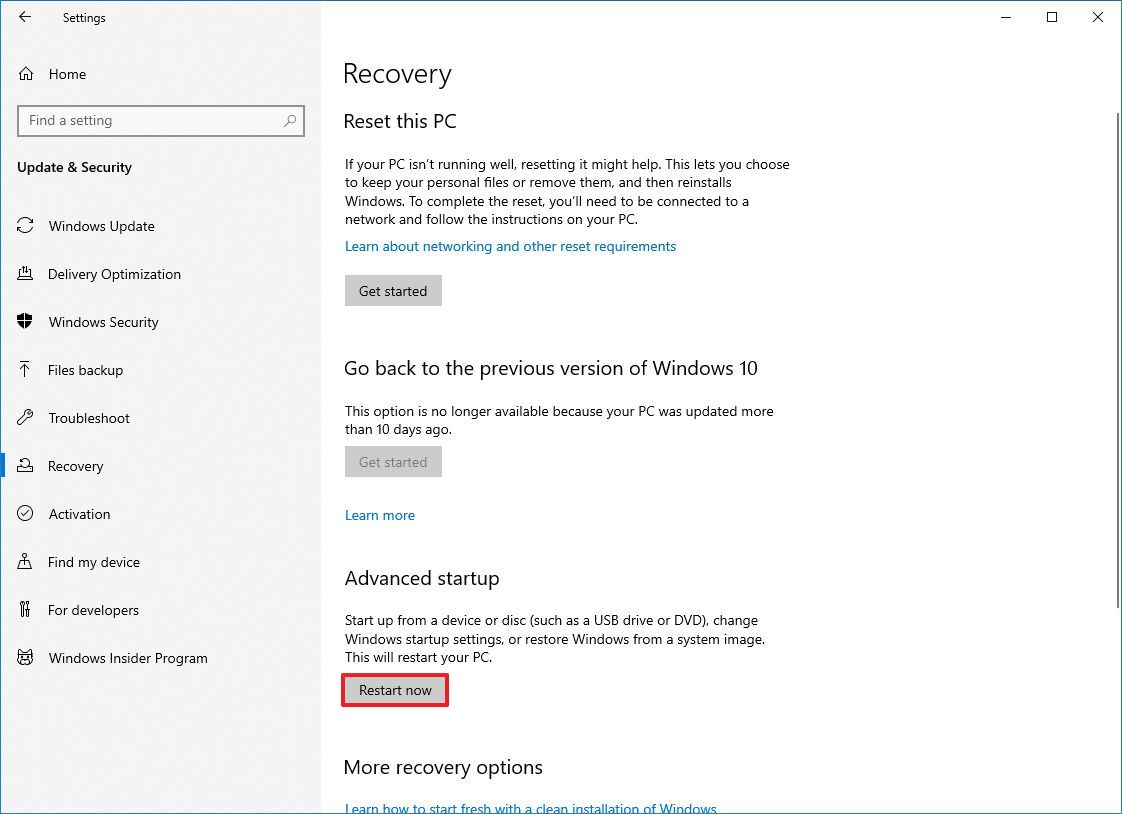
- Click the Troubleshoot button.
- Click on Advanced options.
- Click the “UEFI Firmware Settings” option.
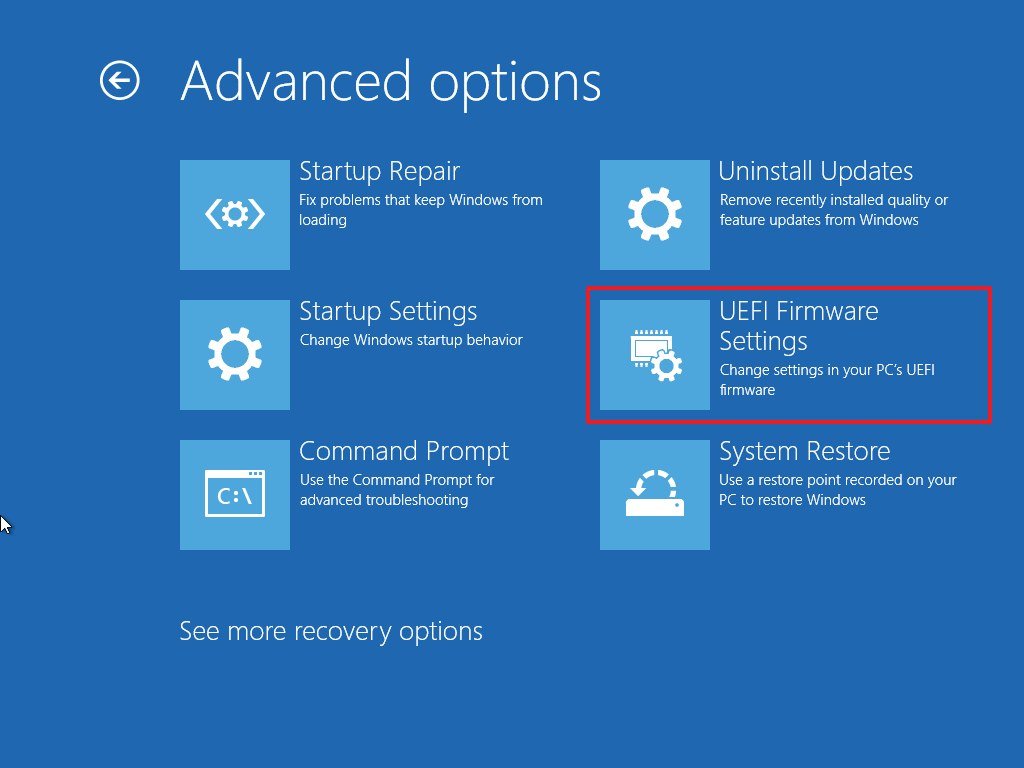
- Click the Restart button.
- Open the Security page.
- Enable the “Trusted Platform Module (TPM)” option (if applicable).
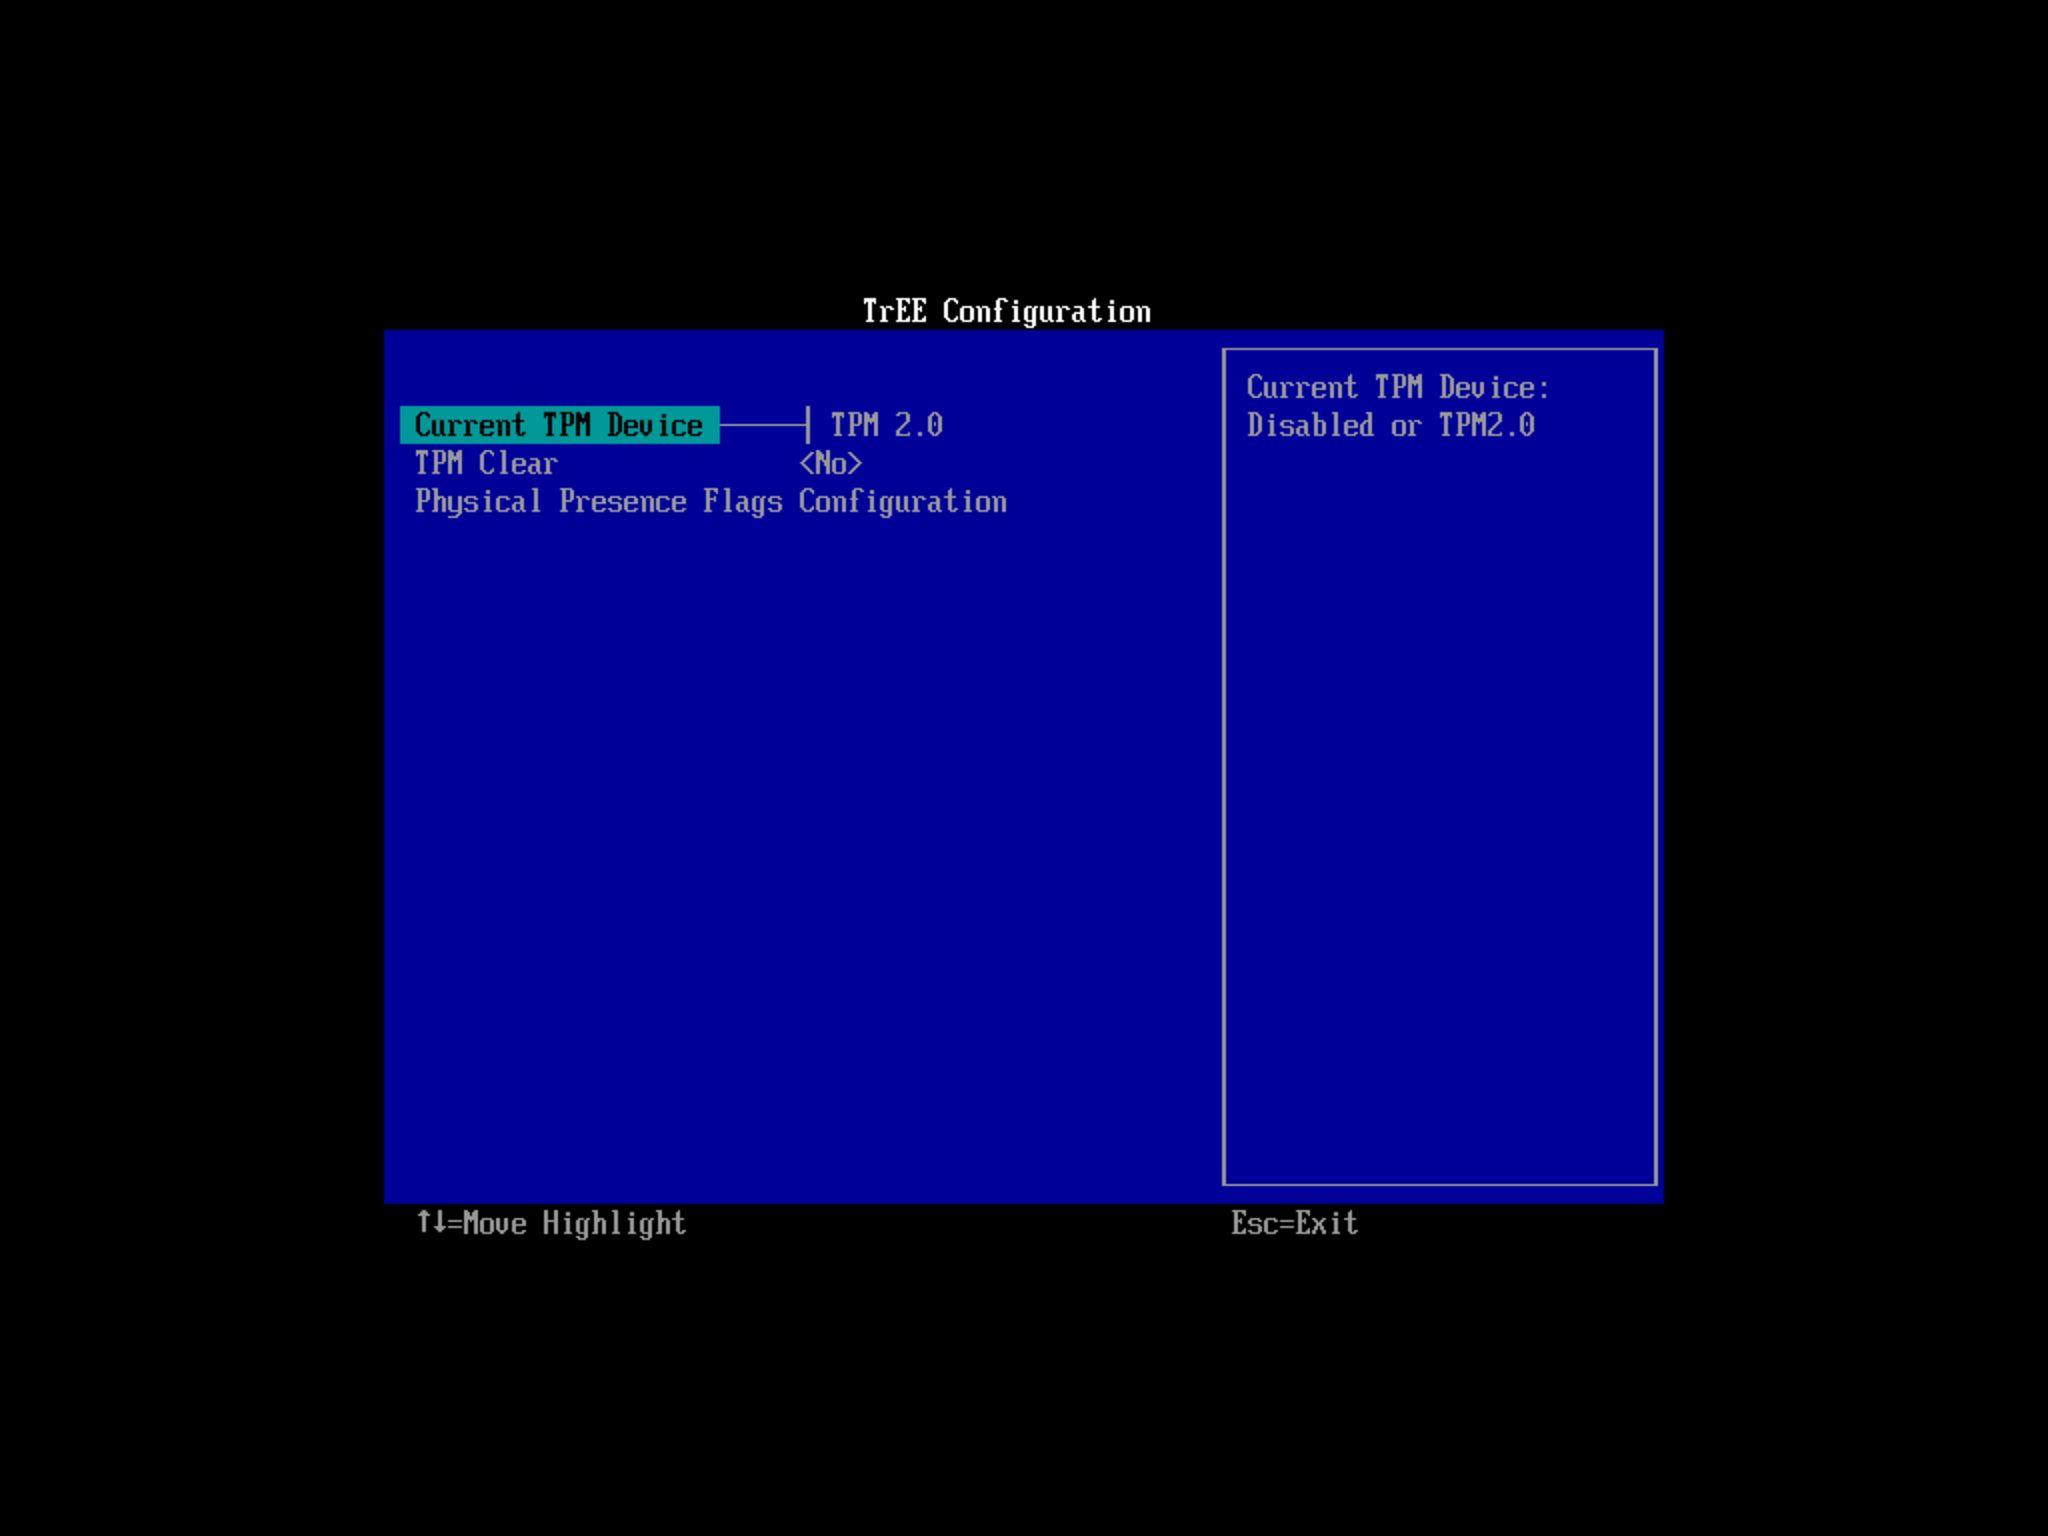
- Enable the Secure Boot option (if applicable).
- (Optional) Open the Boot page.
- Set the boot order to start from the USB flash drive with the Windows 11 installation files (if necessary).
- Save the changes.
Once you complete the steps, you can proceed with the upgrade to the latest version of Windows 11.
Upgrade to Windows 11
To upgrade to Windows 11 from Windows 10, use these steps:
- Open Settings.
- Click on Update & Security.
- Click on Windows Update.
- Click the Check for updates button.
- Click the “Download and install” button.
- Click the Restart now button.

After you complete the steps, the computer will restart, and the upgrade to the newer version of the operating system will begin, preserving your files.
3. Upgrade an unsupported PC to Windows 11
Although Windows 11 has more aggressive system requirements, you may still be able to perform an in-place upgrade on unsupported hardware by creating custom installation media to bypass these requirements.
Before proceeding, it’s worth noting that installing Windows 11 on incompatible hardware is strongly discouraged. Microsoft does not provide support for computers that fail to meet the minimum hardware specifications. Although updates may still be accessible, their functionality isn’t guaranteed.
Additionally, running the operating system without essential security features, such as Trusted Platform Module (TPM) 2.0 and Secure Boot, can expose the system to security risks.
To download and create a Windows 11 USB installation media, use these steps:
- Open the Microsoft download website.
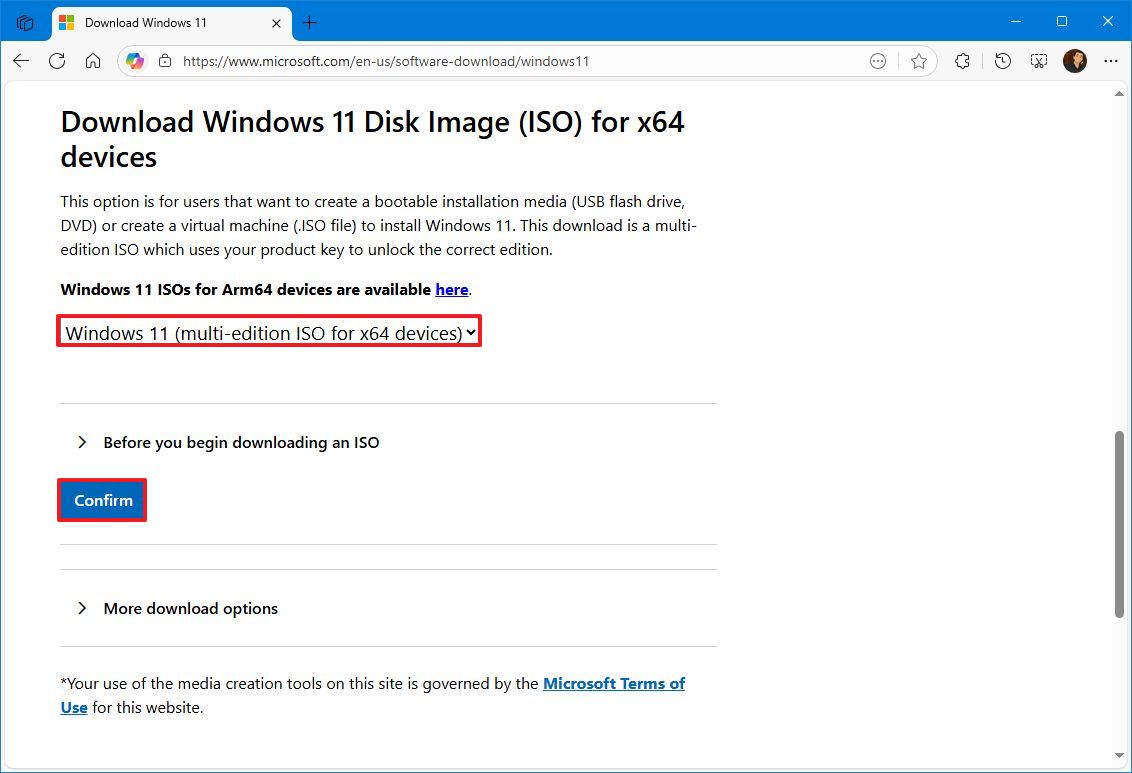
- Select the only Windows 11 option.
- Click the Confirm button under the “Download Windows 11 Disk Image (ISO) for x64 devices” section to save the file to your device.
- Choose the installation language.
- Click the Confirm button.
- Click the “64-bit Download” button.
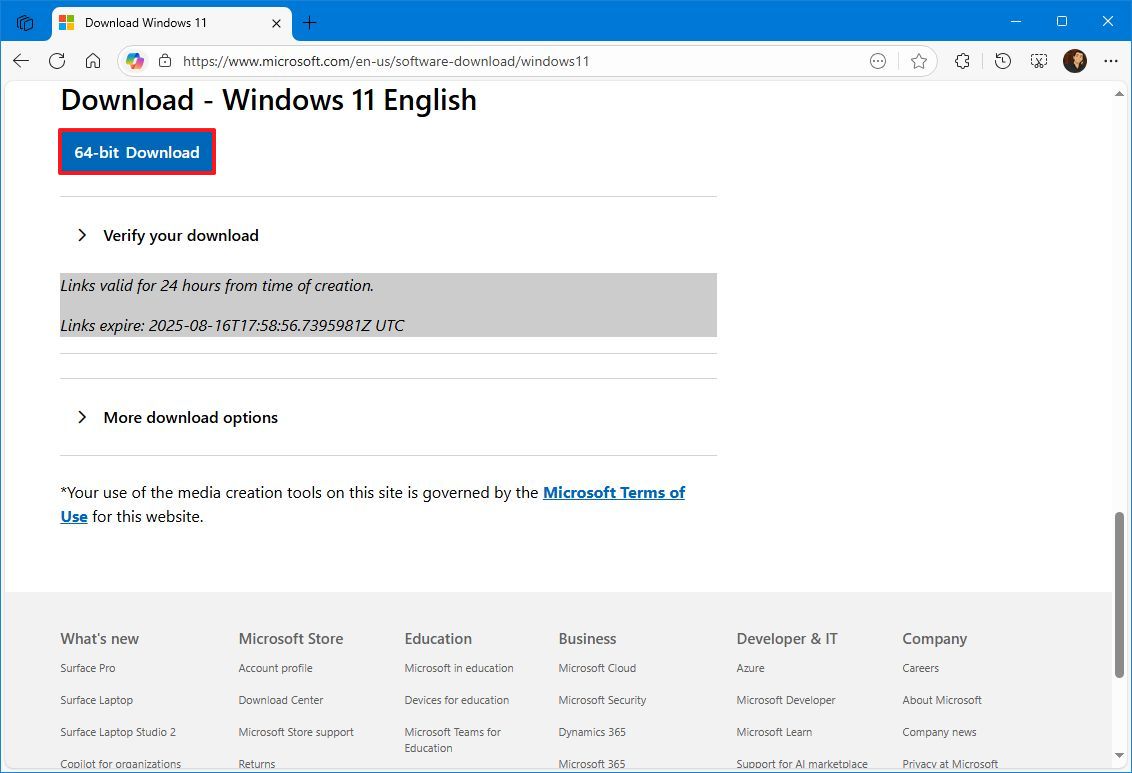
Once you complete the steps, you can proceed to create a USB bootable media that bypasses the hardware requirements.
Create Windows 11 USB installer
To create a USB bootable media, connect a flash drive of at least 8GB of space and use these steps:
- Open the Rufus download page.
- Click the Rufus-4.x.exe (standard) option and save the file on your computer under the “Download” section.
- Double-click the Rufus-x.x.exe file to launch the tool.
- Select the USB flash drive under the “Device” section.
- Click the Select button on the right side.
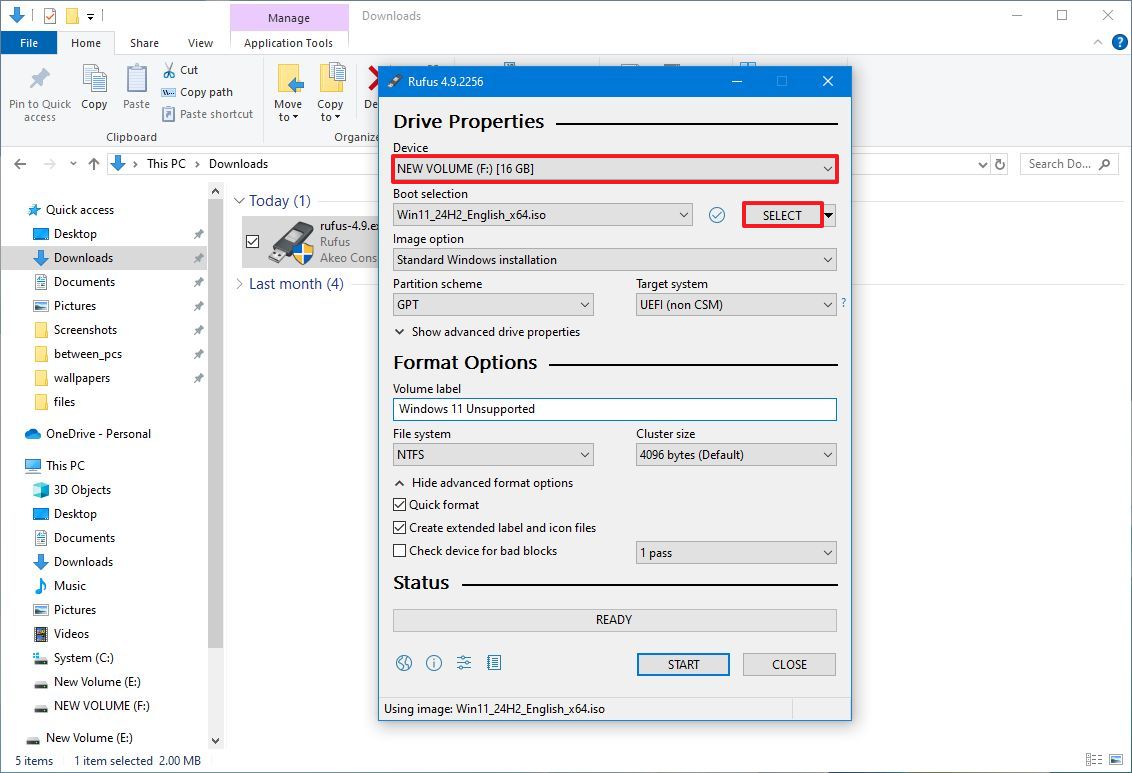
- Select the Windows 11 ISO file from the folder location.
- Click the Open button.
- Select the “Standard Windows Installation” option in the “Image option” setting.
- Select the GPT option in the “Partition scheme” setting.
- Select the “UEFI (non CSM)” option in the “Target system” setting.
- Under the “Show Advanced drive properties” section, do not change the default settings (unless you know what you are doing).
- Under the “Volume label” field, confirm a name for the bootable media — for example, “Windows 11 Unsupported.”
- In the “File system” and “Cluster size” options, do not change the default settings.
- Click the “Show advanced format options” button.
- Check the Quick format option.
- Check the “Create extended label and icon files” option.
- Click the Start button.
- Check the “Remove requirement for 4GB+RAM, Secure Boot and TPM 2.0” option to create a USB flash drive for unsupported devices.
- (Optional) Check the “Remove requirement for an online Microsoft account” option to set up an installation with a local account.
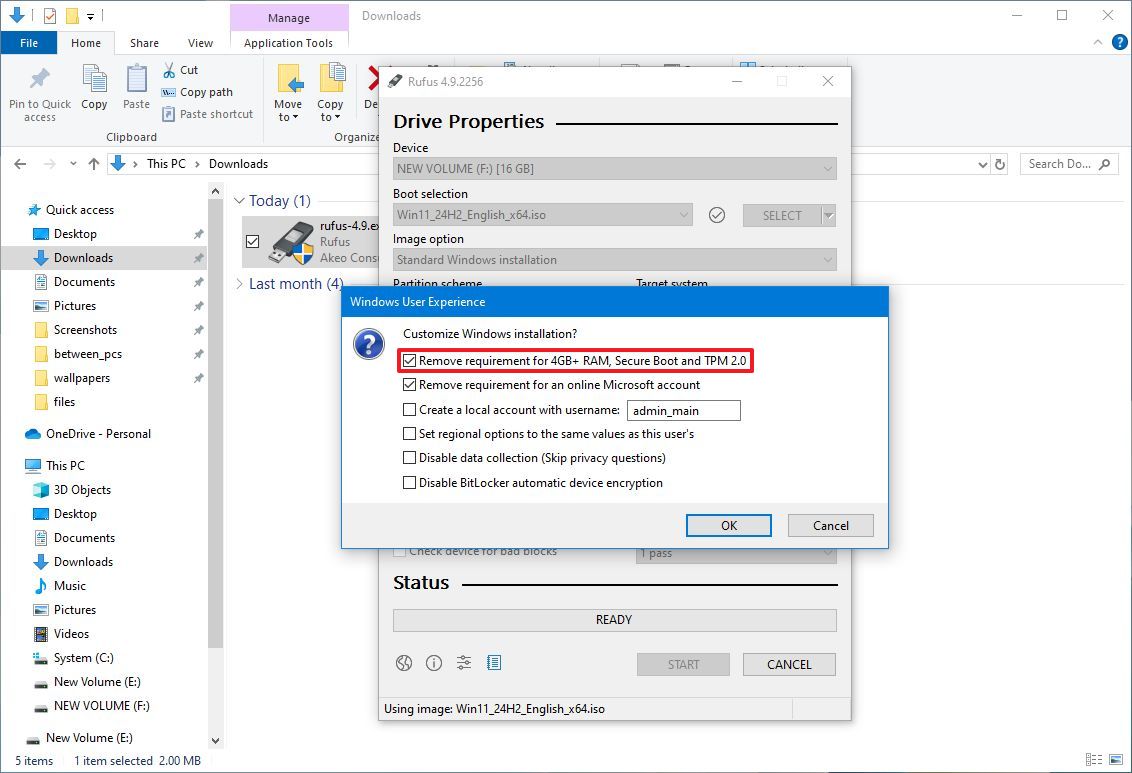
- Click the OK button to confirm.
- Click the Close button.
After you complete the steps, you will be able to install Windows 11 on a device without a supported processor or TPM 2.0.
Upgrade to Windows 11 from 10
To upgrade an unsupported Windows 10 device to Windows 11, connect the USB bootable media, and use these steps:
- Open File Explorer.
- Click on This PC from the left pane.
- Open the USB installation media under the “Devices and drives” section.
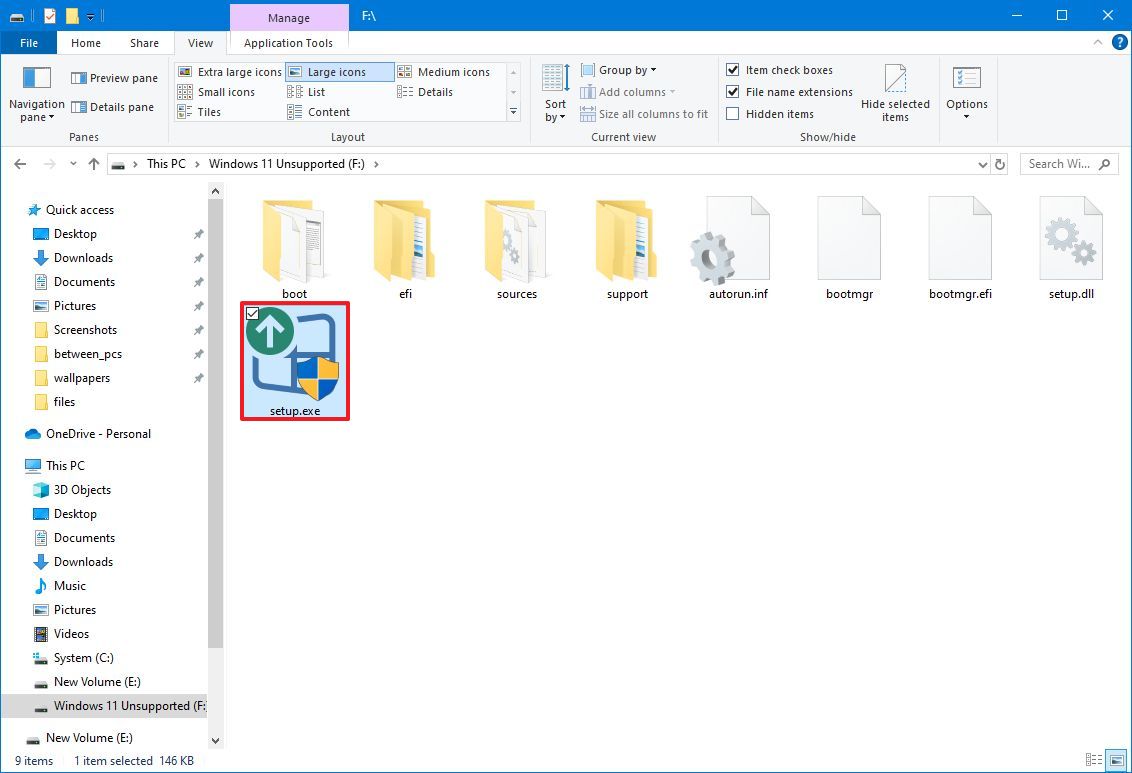
- Double-click the setup.exe file to begin the upgrade process.
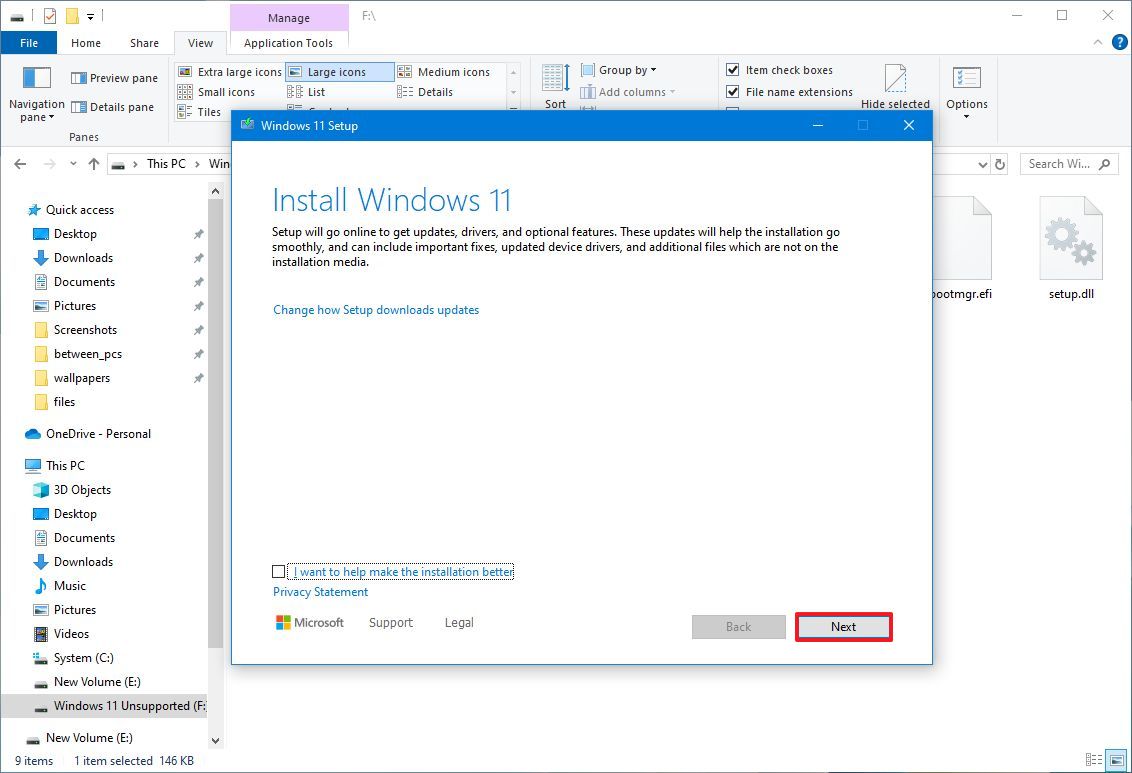
- Click the Next button.
- Click the Accept button.
- Click the Install button.
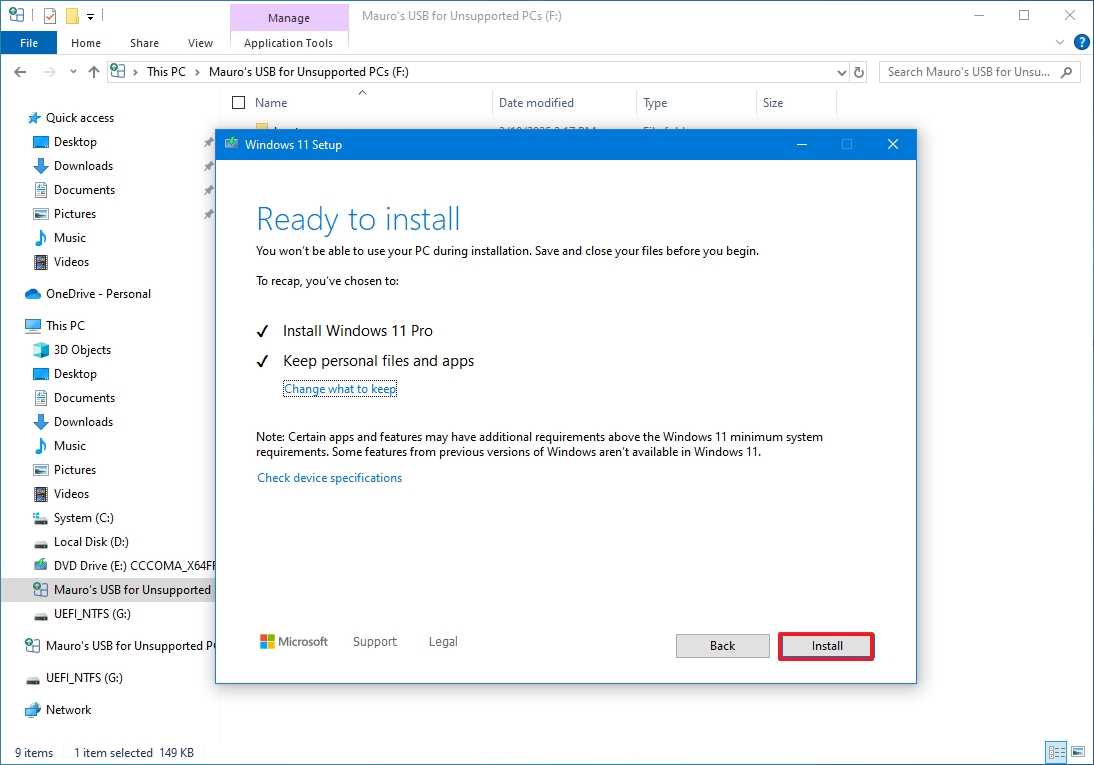
Once you complete the steps, the computer should upgrade to Windows 11, bypassing the requirements.
If you’re having issues with the upgrade, the best approach is to create a full backup of your computer, copy your files to an external storage device, and then proceed with the clean installation option. Then, restore your files in the new installation.
It’s important to note that there are many different ways to make the leap to Windows 11 on unsupported hardware. You can also upgrade using a clean installation, and you can use other tools like Ventoy and Flyoobe, among others.
FAQs about Windows 10 end of life
These are common questions regarding the Windows 10 end of support.
What type of updates will I get using the Extended Security Updates program?
The ESU program only includes critical security updates, just enough to keep your computer secure. This program doesn’t offer improvements or new features.
When is the last day to enroll my device in the ESU program?
You can enroll your computer before or after the end of Windows 10’s life, but you won’t be extending the support. The program will end on October 13, 2026, regardless of when you enrolled.
What are the requirements to enroll my PC in the ESU program?
If you want to enroll your computer in the Extended Security Updates program, you have to make sure that the device is using Windows 10 version 22H2 with the latest updates already installed.
Also, the program requires a Microsoft account. If you have a local account, you’ll be prompted to link your Microsoft account to proceed.
Can I skip the enrollment and use an antivirus to stay protected?
Although an antivirus is critical for maintaining device security, system updates are also crucial for overall protection. In other words, an antivirus is not enough. The computer also needs system updates.
Is upgrading to Windows 11 free?
Yes. If your computer meets the hardware requirements, upgrading to Windows 11 through “Windows Update” is free.
What happens if my PC doesn’t meet Windows 11 requirements?
You can try workarounds to install Windows 11 on unsupported hardware using custom installation media. However, this is not recommended since it may expose your computer to security and stability issues, and Microsoft does not guarantee updates for unsupported systems.
Having said that, it’s still a viable way to use a supported version of the operating system without the computer itself being supported.
Will I lose my files if I upgrade to Windows 11?
If you perform an in-place upgrade, your files and apps should remain intact. However, it’s critical to create a full backup before upgrading in case something goes wrong.
More resources
Explore more in-depth how-to guides, troubleshooting advice, and essential tips to get the most out of Windows 11 and 10. Start browsing here:

Follow Windows Central on Google News to keep our latest news, insights, and features at the top of your feeds!
#Windows #life #options

